Before we get started, let’s seriously think again: Do you need ceiling Atmos speakers in your home? It is not so easy that How to connect ceiling speakers to the receiver.
If you do not have enough caution and patience, then everything can end with a damaged ceiling, a bunch of hanging wires, and a not very happy wife, who will see you as the person who destroyed her beloved room.
And you won’t have any Atmos sound either.
Don’t forget that there are alternative solutions: Dolby Atmos soundbars, bookshelf speakers with Atmos modules, which are no more difficult to connect than a 7.1-channel speaker system.
Keep this in mind! Now we will continue with peace of mind.
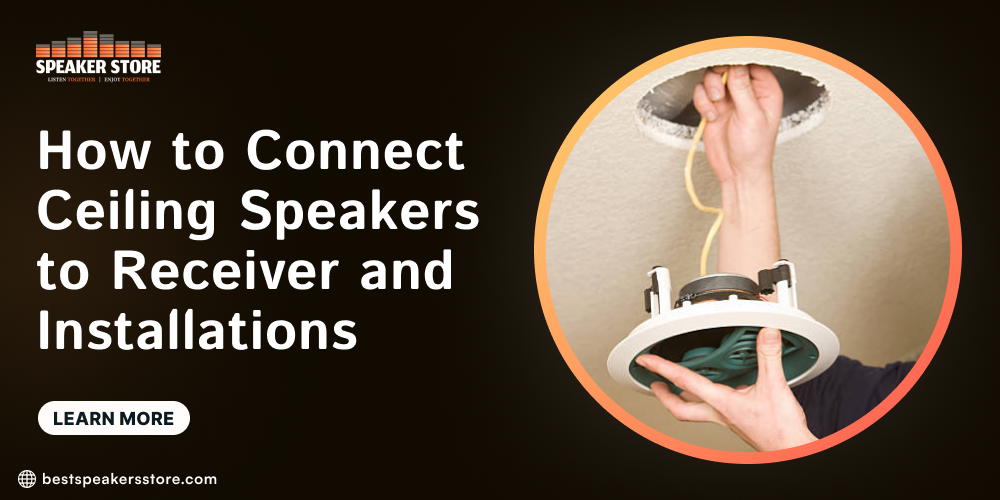
HOW TO CONNECT CEILING SPEAKERS TO RECEIVER?
The key to any successful installation and connect ceiling speakers to the receiver is a well-thought-out plan.
Perhaps unforeseen circumstances will force you to deviate from the plan, but you always need to start with it.
In our case, the plan is something like this:
HOW MANY HEIGHT SPEAKERS DO YOU WANT TO INSTALL?
Some Atmos receivers support up to four high-altitude channels, but you can get by with two.
It is necessary to decide whether the acoustics will locate above the visual places (the best option), or the speakers will install them in the screen area.
Let’s say your receiver only supports two overhead speakers, but in the future, you will buy a system that can accommodate four such speakers.
If you wish, you can install four columns at once for the future. However, this issue must resolve immediately.
COLUMN LAYOUT
Dolby Labs offers several layouts with different ceiling speaker placement options.
These diagrams consider the location of the seats and the previously installed surrounding speakers of your DC system.
Most likely, during installation, you will have to change the pre-designated points for the speakers slightly – ceiling beams may interfere from the translator: from now on we are talking about standard ceilings for American houses, in the conditions of ordinary Russian apartments you will need a second suspended ceiling.
You should know for sure about things like lighting, electrical wiring, or ventilation. Some of this can be an obstacle to installing ceiling speakers.
WIRING
Is one of the always most critical points in our plan.
If you are going to install the speakers in the finished ceiling from the translator: the ceiling in the apartment may be a concrete slab, so first you need to make a second ceiling, then you will have to cut drywall, pull the wires with a special pull-through wire and use different tools.
Everything should be at hand.
How to connect ceiling speakers to receiver chances are huge numbers that you will need to drill beams. If something goes wrong, then you will always have to prime the drywall and paint it. Everything should be ready.
For such work, a specialist is not necessary, but you need to calculate your strength: if you do not have good patience, and you do not know how to work with your hands, then now is the time to think about everything again.
- Discontinuity detector
- Pencil
- Roulette
- Saw
- Screwdriver or screwdriver
- Broaching wire
- Set of rods for cable pulling
CHOOSING SPEAKERS

Before starting work, you need to prepare absolutely everything, including the columns. It is best to choose ceiling speakers that match the characteristics of the rest of your system’s acoustics, but this is not critical. Also, don’t worry about low frequencies – the subwoofer is responsible for the bass. Pay attention to the dispersion of the sound. It should be wide. Ceiling speakers are used to creating a dome effect over your head. Accurately directional acoustics will cope with this task worse.
The amount you will spend on ceiling acoustics depends on your budget and the equipment used in the recreation center.
If your receiver and amplifier are inexpensive, there is little point in spending money on expensive ceiling speakers. Also, do not deceive yourself and buy cheap acoustics for a high-end receiver.
INSTALLATION DEPTH
The diameter of your new ceiling speakers is likely to be around 15-30 cm.
It is not a problem when you consider that ceiling beams are typically 35 cm apart. Column depth can be a problem.
Older houses used thick skylights, but newer buildings made from low profile beams. Thus, there may not be enough depth for the speaker installation.
Understand this issue in advance. Most ceiling speakers are 7-10 cm deep, but some models require up to 20-23 cm.
If an attic above the ceiling, then there is nothing to worry about. Otherwise, you will have to measure the available depth.
After making a small hole in the ceiling, slide the wire through (you can use an extended clothes hanger) until it stops and marks the outside of it. Then always remove the wire and measure the distance from the mark to the end of the wire.
CHOOSING A SPEAKER CABLE
The ceiling speaker cable differs from conventional speaker cable in its thick fireproof insulation.
In the process of pulling, the wires can damage: a suspension or a sharp edge of a bar can cut the insulating layer of a conventional acoustic cable, which will lead to a short circuit or even a fire.
A standard speaker cable is a 16 AWG or 14 AWG two-wire copper cable.
The lower the number of wires, the thicker the cable. In theory, a thicker cable will cope better with lossless signal transmission, but this more often applies to large-scale installations with long distances and high-power equipment.
A 16 AWG cable should be sufficient for small ceiling speakers. You will hardly feel the difference with a larger caliber cable.
On the other hand of speakers, if we are talking about a large DK with a premium receiver and high-end speakers, it makes sense to use a 14 AWG cable.
HOW MUCH CABLE DO YOU NEED?
Professional installers do not have such questions – they use cables in coils.
If possible, do the same. If you always want to save your cost, then you need to carefully measure everything so that you do not have to build up wires later (this firmly not recommends).
If you are sure that you can lay the cable from the receiver to the speakers directly, just measure the distance with an ordinary tape measure, which will act as wires.
If there are any partitions in the path of the cable, then add 3 meters. The entire cable may not be useful, but it is better to take it with a margin.
By the way, these tips with measurements are relevant only if your ceiling not covered with drywall. Otherwise, you need to make approximate measurements,
MAKING HOLES
When all the templates are in place, circle them with a pencil and peel them off—using a drywall knife, cut from the center of the circle to the edge.
Then move around the perimeter, trying to guide the blade precisely along the line of the pencil. Once you have completed a quarter circle, you can remove a piece of drywall and stick your hand or wire through the hole to ensure there are no obstructions around the perimeter.
If all is well, then we continue to cut. If a metal suspension caught on the way, then part of the suspension can be removed with a hacksaw for metal.
If timber caught, it is better to make a new hole. The point is that repairing drywall is much easier than removing a beam (and it’s not safe).
When the hole is ready, take the column (without grill) and try to install it. The speaker should snap into place easily (minimum resistance is acceptable), and there should be no gaps around the edges.
If the column does not fit through the hole, remove some more material around the perimeter, trimming the hole evenly around the edges. If everything is done correctly, then the speaker will inevitably fall into place.
STRETCHING THE CABLE
Before you start pulling the cable, it is worth marking each wire so that it is clear which one is going where (for example, “Ceiling Right Channel” or “Right Atmos”).
Better to label the cable itself, dispensing with stickers that can be lost.
You must understand that each case is individual, so we cannot give clear step-by-step instructions for pulling the cable. It all depends on the room.
There are many quite useful resources on the net with information on this topic.
Look for articles on in-wall speaker installation, cabling, and firewalls, and floor slabs. You can also search for tutorials.
To make it easier for you, we will discuss two very useful tools: pull wire and flexible rods.
BROACHING WIRE
The pull wire is a kind of building tape with a coil of spring steel. This tool is ideal for pulling cables through pipelines, walls, and any other enclosed area where there are virtually no obstructions.
Spring steel is tough enough to be pushed by force, but at the same time, it has excellent flexibility. The pull-out wire is suitable for long-distance wiring, but the path should be clean.
If you are pulling the cable behind the wall, then the pull-through wire must be pushed from the baseboard to the top joint. When the wire comes out from above, you need to tape the cable to it with electrical tape securely.
First, wrap the tape around the wire itself, then around the cable. You will get a closed “cover” for the cable, which will not allow the wire to catch on drywall or something else. The tape should wound as tightly as possible.
When finished with winding, gently lower the wire down so that its tip and the wire are hidden back into the wall. Now you can start broaching. Take your time and make sure that the cable and wire slide down quickly and without snags.
How to connect ceiling speakers to receivers is best if you ask someone to help you. As soon as you feel that the wire is stuck, stop pulling and try to push the wire back up while twisting it.
You may don’t any have to do this operation several times, but the wire will continue on its way in the same way as it did when it went from bottom to top at the beginning.
CABLE PULL RODS
Flexible broaching rods are analogous to pulling wire. These rods also offer increased strength and flexibility.
Various sets of rods are commercially available that are connected to form one large chain. Rods often supply with threaded lugs in the form of hooks, rings, and clips.
The rod differs from the pulling wire in that it does not lie on the surface, but always passes over it: the flexible rod will easily pass over the ceiling without touching the wiring, lighting, and other objects embedded in the drywall.
For a wholly closed ceiling, a flexible rod is better suited.
As with the pull wire, the flexible rod can push or pull backward. Which method is best for you needs to be decided depending on the situation?
A little advice. If you are pushing the cable attached to the rod and hitting something, you will have to pull back.
The cable can jump off the rod and, of course, will not work to fix it. To avoid this, you need to pull the rod and simultaneously rotate it around its axis. It will help wind the cable around the shaft for security.
HOW TO CONNECT CEILING SPEAKERS TO RECEIVER
Let’s assume you have mastered the cabling. Now you need to strip speakers the ends of the copper wires about 2 cm.
The bare cores need to be twisted tightly (each wire separately) and connected to the corresponding terminals on the speaker.
Insert the speaker carefully into the hole, removing any excess wire from the inside of the speaker to prevent vibration.
Use a screwdriver to turn the screws until you hear a click, which indicates that the mounting tab is in place.
Then tighten all the screws (there should be four) until they stop. At the very end, check the reliability by gently pressing on each of the screws.
Do not tighten too much – this can break the thread. It remains to install the grill, and you’re done! Remember, the black wire always connects to the negative terminal.
SETTING UP THE SYSTEM
Remember to tune your receiver after installing new high-altitude Atmos channels.
Find the section with speaker settings in the menu and follow the prompts on the screen. You might need to restart Auto Calibration if a microphone includes the receiver.
Also, on the menu, there can be an item with setting the frequency of crossover for each channel.
Here you need to set the settings by the recommendations of the speaker manufacturer.
Finally, it’s time to tackle the fun part – the choice of Atmos content. We recommend using a good for How to connect ceiling speakers to receiver your system and buying some movies on discs.
All! Relax and enjoy your viewing.